Приложение A. Помощь и решение проблем
Содержание
A.1. Help and Documentation
openSUSE® comes with various sources of information and documentation, many of which are already integrated into your installed system.
- Documentation in
/usr/share/doc This traditional help directory holds various documentation files and release notes for your system. It contains also information of installed packages in the subdirectory
packages. Find more detailed information in Раздел A.1.1, «Documentation Directory».- Man Pages and Info Pages for Shell Commands
When working with the shell, you do not need to know the options of the commands by heart. Traditionally, the shell provides integrated help by means of man pages and info pages. Read more in Раздел A.1.2, «Man Pages» and Раздел A.1.3, «Info Pages».
- Desktop Help Centers
The help centers of both the KDE desktop (Центр справки KDE) and the GNOME desktop (Help) provide central access to the most important documentation resources on your system in searchable form. These resources include online help for installed applications, man pages, info pages, and the Novell/SUSE manuals delivered with your product.
- Separate Help Packages for Some Applications
When installing new software with YaST, the software documentation is installed automatically (in most cases) and usually appears in the help center of your desktop. However, some applications, such as GIMP, may have different online help packages that can be installed separately with YaST and do not integrate into the help centers.
A.1.1. Documentation Directory
The traditional directory to find documentation on your
installed Linux system is /usr/share/doc. Usually,
the directory contains information about the packages installed on your
system, plus release notes, manuals, and more.
![[Note]](admon/note.png) | Contents Depends on Installed Packages |
|---|---|
In the Linux world, many manuals and other kinds of documentation are
available in the form of packages, just like software. How much and
which information you find in | |
A.1.1.1. Novell/SUSE Manuals
We provide HTML and PDF versions of our books in different
languages. In the manual subdirectory, find HTML
versions of most of the Novell/SUSE manuals available for your
product. For an overview of all documentation available for your product
refer to the preface of the manuals.
If more than one language is installed,
/usr/share/doc/manual may contain different
language versions of the manuals. The HTML versions of the Novell/SUSE
manuals are also available in the help center of both desktops. For
information on where to find the PDF and HTML versions of the books on
your installation media, refer to the openSUSE Release Notes. They
are available on your installed system under
/usr/share/doc/release-notes/ or online at your
product-specific Web page at
http://www.suse.com/documentation/.
A.1.1.2. HOWTOs
If the howto
package is installed on your system, /usr/share/doc
also holds the howto subdirectory, where you find
additional documentation for many tasks relating to the setup and
operation of Linux software.
A.1.1.3. Package Documentation
Under packages, find the documentation
that is included in the software packages installed on your system. For
every package, a subdirectory
/usr/share/doc/packages/
is created. It often contains README files for the package and sometimes
examples, configuration files, or additional scripts. The following list
introduces typical files to be found under
packagename/usr/share/doc/packages. None of these entries are
mandatory and many packages might just include a few of them.
AUTHORSList of the main developers.
BUGSKnown bugs or malfunctions. Might also contain a link to a Bugzilla Web page where you can search all bugs.
CHANGES,ChangeLogSummary of changes from version to version. Usually interesting for developers, because it is very detailed.
COPYING,LICENSELicensing information.
FAQQuestion and answers collected from mailing lists or newsgroups.
INSTALLHow to install this package on your system. As the package is already installed by the time you get to read this file, you can safely ignore the contents of this file.
README,README.*General information on the software. For example, for what purpose and how to use it.
TODOThings that are not implemented yet, but probably will be in the future.
MANIFESTList of files with a brief summary.
NEWSDescription of what is new in this version.
A.1.2. Man Pages
Man pages are an essential part of any Linux system. They explain the usage of a command and all available options and parameters. Man pages can be accessed with man followed by the name of the command, for example, man ls.
Man pages are displayed directly in the shell. To navigate them, move up and down with Page Up and Page Down. Move between the beginning and the end of a document with Home and End. End this viewing mode by pressing Q. Learn more about the man command itself with man man. Man pages are sorted in categories as shown in Таблица A.1, «Man Pages—Categories and Descriptions» (taken from the man page for man itself).
Таблица A.1. Man Pages—Categories and Descriptions
|
Number |
Description |
|---|---|
|
1 |
Executable programs or shell commands |
|
2 |
System calls (functions provided by the Kernel) |
|
3 |
Library calls (functions within program libraries) |
|
4 |
Special files (usually found in |
|
5 |
File formats and conventions ( |
|
6 |
Games |
|
7 |
Miscellaneous (including macro packages and conventions), for example, man(7), groff(7) |
|
8 |
System administration commands (usually only for |
|
9 |
Kernel routines (nonstandard) |
Each man page consists of several parts labeled NAME , SYNOPSIS , DESCRIPTION , SEE ALSO , LICENSING , and AUTHOR . There may be additional sections available depending on the type of command.
A.1.3. Info Pages
Info pages are another important source of information on your system. Usually, they are more detailed than man pages. To view the info page for a certain command, enter info followed by the name of the command, for example, info ls. You can browse an info page with a viewer directly in the shell and display the different sections, called «nodes». Use Пробел to move forward and <— to move backwards. Within a node, you can also browse with Page Up and Page Down but only Пробел and <— will take you also to the previous or subsequent node. Press Q to end the viewing mode. Not every man page comes with an info page and vice versa.
A.1.4. Online Resources
In addition to the online versions of the
openSUSE
manuals installed under /usr/share/doc, you can also
access the product-specific manuals and documentation on the Web. For an
overview of all documentation available for openSUSE check out your
product-specific documentation Web page at
http://doc.opensuse.org.
If you are searching for additional product-related information, you can also refer to the following Web sites:
- openSUSE Wiki
Detailed information about lots of different aspects of the openSUSE system can be found in our Wiki at http://en.opensuse.org. You may also contribute to each Wiki page and change or add new pages.
- openSUSE Support Database
The openSUSE Support Database (SDB) can be found at http://en.opensuse.org/Portal:Support_database. It features articles written as solutions for technical problems with openSUSE. They cover issues from installation and configuration, to workarounds for bugs and missing features.
- openSUSE Forums
There are several openSUSE forums where you can dive in on discussions about openSUSE, or get support. See http://en.opensuse.org/openSUSE:Forums_list for a list.
- KDE Documentation
Find documentation for many aspects of KDE suitable for users and administrators at http://www.kde.org/documentation/.
- GNOME Documentation
Documentation for GNOME users, administrators and developers is available at http://library.gnome.org/.
- The Linux Documentation Project
The Linux Documentation Project (TLDP) is run by a team of volunteers who write Linux-related documentation (see http://www.tldp.org). It's probably the most comprehensive documentation resource for Linux. The set of documents contains tutorials for beginners, but is mainly focused on experienced users and professional system administrators. TLDP publishes HOWTOs, FAQs, and guides (handbooks) under a free license. Parts of the documentation from TLDP is also available on openSUSE
You may also want to try general-purpose search engines. For example, use
search terms Linux CD-RW help or OpenOffice
file conversion problem if you have trouble with burning CDs or
LibreOffice file conversion. Google™ also has a Linux-specific search
engine at http://www.google.com/linux that you might find
useful.
A.2. Common Problems and Their Solutions
This chapter describes a range of potential problems and their solutions. Even if your situation is not precisely listed here, there may be one Even if your situation is not precisely listed here, there may be one similar enough to offer hints to the solution of your problem.
A.2.1. Finding and Gathering Information
Linux reports things in a very detailed way. There are several places to look when you encounter problems with your system, most of which are standard to Linux systems in general, and some of which are relevant to openSUSE systems. Most log files can be viewed with YaST (+).
A list of the most frequently checked log files follows with the
description of their typical purpose. Paths containing
~ refer to the current user's home directory.
Таблица A.2. Log Files
|
Log File |
Description |
|---|---|
|
|
Messages from the desktop applications currently running. |
|
|
Log files from AppArmor, see Часть “Ограничение привилегий с AppArmor” (↑Руководство по безопасности) for detailed information. |
|
|
Messages from the kernel reported during the boot process. |
|
|
Messages from the mail system. |
|
|
Ongoing messages from the kernel and system log daemon (when running). |
|
|
Log file from NetworkManager to collect problems with network connectivity |
|
|
Directory containing Samba server and client log messages. |
|
|
Hardware messages from the SaX display and KVM system. |
|
|
All messages from the kernel and system log daemon with the «warning» level or higher. |
|
|
Binary file containing user login records for the current machine session. View it with last. |
|
|
Various start-up and runtime logs from the X Window system. It is useful for debugging failed X start-ups. |
|
|
Directory containing YaST's actions and their results. |
|
|
Log file of zypper. |
Apart from log files, your machine also supplies you with information
about the running system. See
Таблица A.3: System Information With the /proc File System
Таблица A.3. System Information With the /proc File System
|
File |
Description |
|---|---|
|
|
Contains processor information, including its type, make, model, and performance. |
|
|
Shows which DMA channels are currently being used. |
|
|
Shows which interrupts are in use, and how many of each have been in use. |
|
|
Displays the status of I/O (input/output) memory. |
|
|
Shows which I/O ports are in use at the moment. |
|
|
Displays memory status. |
|
|
Displays the individual modules. |
|
|
Displays devices currently mounted. |
|
|
Shows the partitioning of all hard disks. |
|
|
Displays the current version of Linux. |
Apart from the /proc file system, the Linux kernel
exports information with the sysfs module, an
in-memory filesystem. This module represents kernel objects, their
attributes and relationships. For more information about
sysfs, see the context of udev in
Глава 8, Dynamic Kernel Device Management with udev (↑Содержание).
Таблица A.4
contains an overview of the most common directories under
/sys.
Таблица A.4. System Information With the /sys File System
|
File |
Description |
|---|---|
|
|
Contains subdirectories for each block device discovered in the system. Generally, these are mostly disk type devices. |
|
|
Contains subdirectories for each physical bus type. |
|
|
Contains subdirectories grouped together as a functional types of devices (like graphics, net, printer, etc.) |
|
|
Contains the global device hierarchy. |
Linux comes with a number of tools for system analysis and monitoring. See Chapter 2, System Monitoring Utilities (↑System Analysis and Tuning Guide) for a selection of the most important ones used in system diagnostics.
Each of the following scenarios begins with a header describing the problem followed by a paragraph or two offering suggested solutions, available references for more detailed solutions, and cross-references to other scenarios that are related.
A.2.2. Installation Problems
Installation problems are situations when a machine fails to install. It may fail entirely or it may not be able to start the graphical installer. This section highlights some of the typical problems you may run into, and offers possible solutions or workarounds for these kinds of situations.
A.2.2.1. Checking Media
If you encounter any problems using the openSUSE installation media, check the integrity of your installation media. Boot from the media and choose from the boot menu. In a running system, start YaST and choose +. Media problems are more probable with the media you burn yourself. Burning the media at a low speed (4x) helps avoiding problems.
A.2.2.2. Hardware Information
Display detected hardware and technical data using +. Click any node of the tree for more information about a device. This module is especially useful, when submitting a support request for which you need information about your hardware.
Save the displayed hardware information to a file by clicking . Select the desired directory and filename then click to create the file.
A.2.2.3. No Bootable DVD Drive Available
If your computer does not contain a bootable DVD-ROM drive or if the one you have is not supported by Linux, there are several options you can install your machine without a built-in DVD drive:
- Using an External Boot Device
If it is supported by your BIOS and the installation kernel, boot from external DVD drives or USB storage devices.
- Network Boot via PXE
If a machine lacks a DVD drive, but provides a working ethernet connection, perform a completely network-based installation. See Раздел “Remote Installation via VNC—PXE Boot and Wake on LAN” (Глава 2, Remote Installation, ↑Содержание) and Раздел “Remote Installation via SSH—PXE Boot and Wake on LAN” (Глава 2, Remote Installation, ↑Содержание) for details.
A.2.2.3.1. External Boot Devices
Linux supports most existing DVD drives. If the system has neither a DVD drive nor a floppy disk, it is still possible that an external DVD drive, connected through USB, FireWire, or SCSI, can be used to boot the system. This depends mainly on the interaction of the BIOS and the hardware used. Sometimes a BIOS update may help if you encounter problems.
When installing from a KDE or GNOME Live CD, you can also create a «Live USB stick» to boot from. Refer to http://en.opensuse.org/Live_USB_stick for detailed instructions.
A.2.2.4. Booting from Installation Media Fails
One reason why a machine does not boot the installation media can be an incorrect boot sequence setting in BIOS. The BIOS boot sequence must have DVD drive set as the first entry for booting. Otherwise the machine would try to boot from another medium, typically the hard disk. Guidance for changing the BIOS boot sequence can be found the documentation provided with your motherboard, or in the following paragraphs.
The BIOS is the software that enables the very basic functions of a computer. Motherboard vendors provide a BIOS specifically made for their hardware. Normally, the BIOS setup can only be accessed at a specific time—when the machine is booting. During this initialization phase, the machine performs a number of diagnostic hardware tests. One of them is a memory check, indicated by a memory counter. When the counter appears, look for a line, usually below the counter or somewhere at the bottom, mentioning the key to press to access the BIOS setup. Usually the key to press is one of Del, F1, or Esc. Press this key until the BIOS setup screen appears.
Процедура A.1. Changing the BIOS Boot Sequence
Enter the BIOS using the proper key as announced by the boot routines and wait for the BIOS screen to appear.
To change the boot sequence in an AWARD BIOS, look for the entry. Other manufacturers may have a different name for this, such as . When you have found the entry, select it and confirm with Enter.
In the screen that opens, look for a subentry called or . The boot sequence looks something like
C,AorA,C. In the former case, the machine first searches the hard disk (C) then the floppy drive (A) to find a bootable medium. Change the settings by pressing PgUp or PgDown until the sequence isA,CDROM,C.Leave the BIOS setup screen by pressing Esc. To save the changes, select , or press F10. To confirm that your settings should be saved, press Y.
Процедура A.2. Changing the Boot Sequence in a SCSI BIOS (Adaptec Host Adapter)
Open the setup by pressing Ctrl+A.
Select . The connected hardware components are now displayed.
Make note of the SCSI ID of your DVD drive.
Exit the menu with Esc.
Open . Under , select and press Enter.
Enter the ID of the DVD drive and press Enter again.
Press Esc twice to return to the start screen of the SCSI BIOS.
Exit this screen and confirm with to boot the computer.
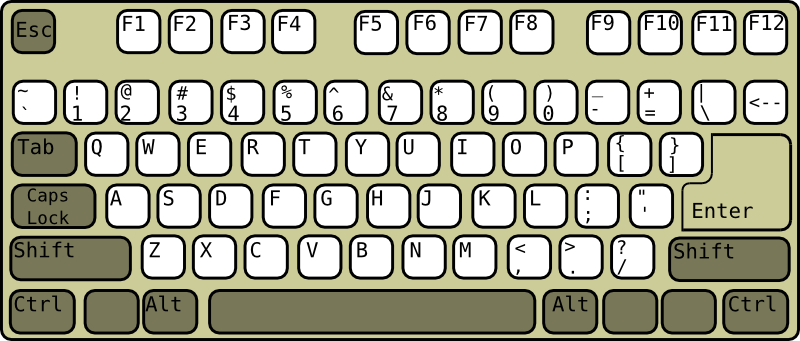
Regardless of what language and keyboard layout your final installation will be using, most BIOS configurations use the US keyboard layout as depicted in the following figure:
A.2.2.5. Fails to Boot
Some hardware types, mainly very old or very recent ones, fail to install. In many cases, this may happen because support for this type of hardware is missing in the installation kernel, or due to certain functionality included in this kernel, such as ACPI, that can still cause problems on some hardware.
If your system fails to install using the standard mode from the first installation boot screen, try the following:
With the DVD still in the drive, reboot the machine with Ctrl-Alt-Delete or using the hardware reset button.
When the boot screen appears, press F5, use the arrow keys of your keyboard to navigate to and press Enter to launch the boot and installation process. This option disables the support for ACPI power management techniques.
Proceed with the installation as described in Глава 1, Installation with YaST (↑Содержание).
If this fails, proceed as above, but choose instead. This option disables ACPI and DMA support. Most hardware will boot with this option.
If both of these options fail, use the boot options prompt to pass any
additional parameters needed to support this type of hardware to the
installation kernel. For more information about the parameters available
as boot options, refer to the kernel documentation located in
/usr/src/linux/Documentation/kernel-parameters.txt.
![[Tip]](admon/tip.png) | Obtaining Kernel Documentation |
|---|---|
Install the | |
There are various other ACPI-related kernel parameters that can be entered at the boot prompt prior to booting for installation:
acpi=offThis parameter disables the complete ACPI subsystem on your computer. This may be useful if your computer cannot handle ACPI at all or if you think ACPI in your computer causes trouble.
acpi=forceAlways enable ACPI even if your computer has an old BIOS dated before the year 2000. This parameter also enables ACPI if it is set in addition to
acpi=off.acpi=noirqDo not use ACPI for IRQ routing.
acpi=htRun only enough ACPI to enable hyper-threading.
acpi=strictBe less tolerant of platforms that are not strictly ACPI specification compliant.
pci=noacpiDisable PCI IRQ routing of the new ACPI system.
pnpacpi=offThis option is for serial or parallel problems when your BIOS setup contains wrong interrupts or ports.
notscDisable the time stamp counter. This option can be used to work around timing problems on your systems. It is a recent feature, if you see regressions on your machine, especially time related or even total hangs, this option is worth a try.
nohz=offDisable the nohz feature. If your machine hangs, this option may help. Otherwise it is of no use.
Once you have determined the right parameter combination, YaST automatically writes them to the boot loader configuration to make sure that the system boots properly next time.
If unexplainable errors occur when the kernel is loaded or during the installation, select in the boot menu to check the memory. If returns an error, it is usually a hardware error.
A.2.2.6. Fails to Launch Graphical Installer
After you insert the medium into your drive and reboot your machine, the installation screen comes up, but after you select , the graphical installer does not start.
There are several ways to deal with this situation:
Try to select another screen resolution for the installation dialogs.
Select for installation.
Do a remote installation via VNC using the graphical installer.
Процедура A.3. Change Screen Resolution for Installation
Boot for installation.
Press F3 to open a menu from which to select a lower resolution for installation purposes.
Select and proceed with the installation as described in Глава 1, Installation with YaST (↑Содержание).
Процедура A.4. Installation in Text Mode
Boot for installation.
Press F3 and select .
Select and proceed with the installation as described in Глава 1, Installation with YaST (↑Содержание).
Процедура A.5. VNC Installation
Boot for installation.
Enter the following text at the boot options prompt:
vnc=1 vncpassword=
some_passwordReplace
some_passwordwith the password to use for VNC installation.Select then press Enter to start the installation .
Instead of starting right into the graphical installation routine, the system continues to run in a text mode, then halts, displaying a message containing the IP address and port number at which the installer can be reached via a browser interface or a VNC viewer application.
If using a browser to access the installer, launch the browser and enter the address information provided by the installation routines on the future openSUSE machine and hit Enter:
http://
ip_address_of_machine:5801A dialog opens in the browser window prompting you for the VNC password. Enter it and proceed with the installation as described in Глава 1, Installation with YaST (↑Содержание).
![[Important]](admon/important.png)
Installation via VNC works with any browser under any operating system, provided Java support is enabled.
Provide the IP address and password to your VNC viewer when prompted. A window opens, displaying the installation dialogs. Proceed with the installation as usual.
A.2.2.7. Only Minimalistic Boot Screen Started
You inserted the medium into the drive, the BIOS routines are finished, but the system does not start with the graphical boot screen. Instead it launches a very minimalistic text-based interface. This may happen on any machine not providing sufficient graphics memory for rendering a graphical boot screen.
Although the text boot screen looks minimalistic, it provides nearly the same functionality as the graphical one:
- Boot Options
Unlike the graphical interface, the different boot options cannot be selected using the cursor keys of your keyboard. The boot menu of the text mode boot screen offers some keywords to enter at the boot prompt. These keywords map to the options offered in the graphical version. Enter your choice and hit Enter to launch the boot process.
- Custom Boot Options
After selecting a boot option, enter the appropriate keyword at the boot prompt or enter some custom boot options as described in Раздел A.2.2.5, «Fails to Boot». To launch the installation process, press Enter.
- Screen Resolutions
Use the F keys to determine the screen resolution for installation. If you need to boot in text mode, choose F3.
A.2.3. Boot Problems
Boot problems are situations when your system does not boot properly (does not boot to the expected runlevel and login screen).
A.2.3.1. Fails to Load the GRUB Boot Loader
If the hardware is functioning properly, it is possible that the boot loader is corrupted and Linux cannot start on the machine. In this case, it is necessary to repair the boot loader. To do so, you need start the Rescue System as described in Раздел A.2.7, «Recovering a Corrupted System» and follow the instructions at Раздел A.2.7.1.4, «Modifying and Reinstalling the Boot Loader».
Other reasons for the machine not booting may be BIOS-related:
- BIOS Settings
Check your BIOS for references to your hard drive. GRUB may simply not be started if the hard drive itself cannot be found with the current BIOS settings.
- BIOS Boot Order
Check whether your system's boot order includes the hard disk. If the hard disk option was not enabled, your system may install properly, but fails to boot when access to the hard disk is required.
A.2.3.2. No Graphical Login
If the machine comes up, but does not boot into the graphical login
manager, anticipate problems either with the choice of the default
runlevel or the configuration of the X Window System. To check the
runlevel configuration, log in as the
root user and check whether
the machine is configured to boot into runlevel 5 (graphical desktop). A
quick way to check this is to examine the contents of
/etc/inittab, as follows:
tux@mercury:~> grep "id:" /etc/inittab
id:5:initdefault:
The returned line indicates that the machine's default runlevel
(initdefault) is set to 5 and that
it should boot to the graphical desktop. If the runlevel is set to any
other number, use the YaST Runlevel Editor module to set it to
5.
| |
Do not edit the runlevel configuration manually. Otherwise SuSEconfig
(run by YaST) will overwrite these changes on its next run. If you
need to make manual changes here, disable future SuSEconfig changes by
setting | |
If the runlevel is set to 5, your desktop or X
Windows software is probably misconfigured or corrupted. Examine the log
files at /var/log/Xorg.*.log for detailed messages
from the X server as it attempted to start. If the desktop fails during
start, it may log error messages to
/var/log/messages. If these error messages hint at
a configuration problem in the X server, try to fix these issues. If the
graphical system still does not come up, consider reinstalling the
graphical desktop.
| Starting X Window System Manually |
|---|---|
One quick test: the startx command should force the X Window System to start with the configured defaults if the user is currently logged in on the console. If that does not work, it should log errors to the console. | |
A.2.4. Login Problems
Login problems are those where your machine does, in fact, boot to the expected welcome screen or login prompt, but refuses to accept the username and password, or accepts them but then does not behave properly (fails to start the graphic desktop, produces errors, drops to a command line, etc.).
A.2.4.1. Valid Username and Password Combinations Fail
This usually occurs when the system is configured to use network
authentication or directory services and, for some reason, is unable to
retrieve results from its configured servers. The
root user, as the only local
user, is the only user that can still log in to these machines. The
following are some common reasons why a machine appears functional but
is unable to process logins correctly:
The network is not working. For further directions on this, turn to Раздел A.2.5, «Network Problems».
DNS is not working at the moment (which prevents GNOME or KDE from working and the system from making validated requests to secure servers). One indication that this is the case is that the machine takes an extremely long time to respond to any action. Find more information about this topic in Раздел A.2.5, «Network Problems».
If the system is configured to use Kerberos, the system's local time may have drifted past the accepted variance with the Kerberos server time (this is typically 300 seconds). If NTP (network time protocol) is not working properly or local NTP servers are not working, Kerberos authentication ceases to function because it depends on common clock synchronization across the network.
The system's authentication configuration is misconfigured. Check the PAM configuration files involved for any typographical errors or misordering of directives. For additional background information about PAM and the syntax of the configuration files involved, refer to Глава 2, Авторизация с помощью PAM (↑Руководство по безопасности).
The home partition is encrypted. Find more information about this topic in Раздел A.2.4.3, «Login to Encrypted Home Partition Fails».
In all cases that do not involve external network problems, the solution is to reboot the system into single-user mode and repair the configuration before booting again into operating mode and attempting to log in again. To boot into single-user mode:
A.2.4.2. Valid Username and Password Not Accepted
This is by far the most common problem users encounter, because there are many reasons this can occur. Depending on whether you use local user management and authentication or network authentication, login failures occur for different reasons.
Local user management can fail for the following reasons:
The user may have entered the wrong password.
The user's home directory containing the desktop configuration files is corrupted or write protected.
There may be problems with the X Window System authenticating this particular user, especially if the user's home directory has been used with another Linux distribution prior to installing the current one.
To locate the reason for a local login failure, proceed as follows:
Check whether the user remembered his password correctly before you start debugging the whole authentication mechanism. If the user may not remember his password correctly, use the YaST User Management module to change the user's password. Pay attention to the Caps Lock key and unlock it, if necessary.
Log in as
rootand check/var/log/messagesfor error messages of the login process and of PAM.Try to log in from a console (using Ctrl+Alt+F1). If this is successful, the blame cannot be put on PAM, because it is possible to authenticate this user on this machine. Try to locate any problems with the X Window System or the desktop (GNOME or KDE). For more information, refer to Раздел A.2.4.4, «Login Successful but GNOME Desktop Fails» and Раздел A.2.4.5, «Login Successful but KDE Desktop Fails».
If the user's home directory has been used with another Linux distribution, remove the
Xauthorityfile in the user's home. Use a console login via Ctrl+Alt+F1 and run rm .Xauthority as this user. This should eliminate X authentication problems for this user. Try graphical login again.If graphical login still fails, do a console login with Ctrl+Alt+F1. Try to start an X session on another display—the first one (
:0) is already in use:startx -- :1
This should bring up a graphical screen and your desktop. If it does not, check the log files of the X Window System (
/var/log/Xorg.) or the log file for your desktop applications (displaynumber.log.xsession-errorsin the user's home directory) for any irregularities.If the desktop could not start because of corrupt configuration files, proceed with Раздел A.2.4.4, «Login Successful but GNOME Desktop Fails» or Раздел A.2.4.5, «Login Successful but KDE Desktop Fails».
The following are some common reasons why network authentication for a particular user may fail on a specific machine:
The user may have entered the wrong password.
The username exists in the machine's local authentication files and is also provided by a network authentication system, causing conflicts.
The home directory exists but is corrupt or unavailable. Perhaps it is write protected or is on a server that is inaccessible at the moment.
The user does not have permission to log in to that particular host in the authentication system.
The machine has changed hostnames, for whatever reason, and the user does not have permission to log in to that host.
The machine cannot reach the authentication server or directory server that contains that user's information.
There may be problems with the X Window System authenticating this particular user, especially if the user's home has been used with another Linux distribution prior to installing the current one.
To locate the cause of the login failures with network authentication, proceed as follows:
Check whether the user remembered their password correctly before you start debugging the whole authentication mechanism.
Determine the directory server which the machine relies on for authentication and make sure that it is up and running and properly communicating with the other machines.
Determine that the user's username and password work on other machines to make sure that his authentication data exists and is properly distributed.
See if another user can log in to the misbehaving machine. If another user can log in without difficulty or if
rootcan log in, log in and examine the/var/log/messagesfile. Locate the time stamps that correspond to the login attempts and determine if PAM has produced any error messages.Try to log in from a console (using Ctrl+Alt+F1). If this is successful, the problem is not with PAM or the directory server on which the user's home is hosted, because it is possible to authenticate this user on this machine. Try to locate any problems with the X Window System or the desktop (GNOME or KDE). For more information, refer to Раздел A.2.4.4, «Login Successful but GNOME Desktop Fails» and Раздел A.2.4.5, «Login Successful but KDE Desktop Fails».
If the user's home directory has been used with another Linux distribution, remove the
Xauthorityfile in the user's home. Use a console login via Ctrl+Alt+F1 and run rm .Xauthority as this user. This should eliminate X authentication problems for this user. Try graphical login again.If graphical login still fails, do a console login with Ctrl+Alt+F1. Try to start an X session on another display—the first one (
:0) is already in use:startx -- :1
This should bring up a graphical screen and your desktop. If it does not, check the log files of the X Window System (
/var/log/Xorg.) or the log file for your desktop applications (displaynumber.log.xsession-errorsin the user's home directory) for any irregularities.If the desktop could not start because of corrupt configuration files, proceed with Раздел A.2.4.4, «Login Successful but GNOME Desktop Fails» or Раздел A.2.4.5, «Login Successful but KDE Desktop Fails».
A.2.4.3. Login to Encrypted Home Partition Fails
It is recommended to use an encrypted home partition for laptops. If you cannot log in to your laptop, the reason is usually simple: your partition could not be unlocked.
During the boot time, you have to enter the passphrase to unlock your encrypted partition. If you do not enter it, the boot process continues, leaving the partition locked.
To unlock your encrypted partition, proceed as follows:
Switch to the text console with Ctrl+Alt+F1.
Become
root.Restart the unlocking process again with:
/etc/init.d/boot.crypto restart
Enter your passphrase to unlock your encrypted partition.
Exit the text console and switch back to the login screen with Alt+F7.
Log in as usual.
A.2.4.4. Login Successful but GNOME Desktop Fails
If this is the case, it is likely that your GNOME configuration files have become corrupted. Some symptoms may include the keyboard failing to work, the screen geometry becoming distorted, or even the screen coming up as a bare gray field. The important distinction is that if another user logs in, the machine works normally. It is then likely that the problem can be fixed relatively quickly by simply moving the user's GNOME configuration directory to a new location, which causes GNOME to initialize a new one. Although the user is forced to reconfigure GNOME, no data is lost.
Switch to a text console by pressing Ctrl+Alt+F1.
Log in with your user name.
Move the user's GNOME configuration directories to a temporary location:
mv .gconf  .gconf-ORIG-RECOVER
mv .gnome2 .gnome2-ORIG-RECOVER
Log out.
Log in again, but do not run any applications.
Recover your individual application configuration data (including the Evolution e-mail client data) by copying the
~/.gconf-ORIG-RECOVER/apps/directory back into the new~/.gconfdirectory as follows:cp -a .gconf-ORIG-RECOVER/apps .gconf/
If this causes the login problems, attempt to recover only the critical application data and reconfigure the remainder of the applications.
A.2.4.5. Login Successful but KDE Desktop Fails
There are several reasons why a KDE desktop would not allow users to login. Corrupted cache data can cause login problems as well as corrupt KDE desktop configuration files.
Cache data is used at desktop start-up to increase performance. If this data is corrupted, start-up is slowed down or fails entirely. Removing them forces the desktop start-up routines to start from scratch. This takes more time than a normal start-up, but data is intact after this and the user can login.
To remove the cache files of the KDE desktop, issue the following
command as root:
rm -rf /tmp/kde-user/tmp/ksocket-user
Replace user with your username. Removing
these two directories just removes the corrupted cache files. No real
data is harmed using this procedure.
Corrupted desktop configuration files can always be replaced with the initial configuration files. If you want to recover the user's adjustments, carefully copy them back from their temporary location after the configuration has been restored, using the default configuration values.
To replace a corrupted desktop configuration with the initial configuration values, proceed as follows:
Switch to a text console by pressing Ctrl+Alt+F1.
Log in with your username.
Move the KDE configuration directory and the
.skelfiles to a temporary location:For KDE3 use these commands:
mv .kde  .kde-ORIG-RECOVER
mv .skel .skel-ORIG-RECOVER
For KDE4 use these commands:
mv .kde4  .kde4-ORIG-RECOVER
mv .skel .skel-ORIG-RECOVER
Log out.
Log in again.
After the desktop has started successfully, copy the user's own configurations back into place:
cp -a
KDEDIR/share .kde/shareReplace
KDEDIRwith the directory from Шаг 3.If the user's own adjustments caused the login to fail and continue to do so, repeat the procedure as described above, but do not copy the
.kde/sharedirectory.
A.2.5. Network Problems
Many problems of your system may be network-related, even though they do not seem to be at first. For example, the reason for a system not allowing users to log in may be a network problem of some kind. This section introduces a simple check list you can apply to identify the cause of any network problem encountered.
Процедура A.6. How to Identify Network Problems
When checking the network connection of your machine, proceed as follows:
If you use an ethernet connection, check the hardware first. Make sure that your network cable is properly plugged into your computer and router (or hub, etc.). The control lights next to your ethernet connector are normally both be active.
If the connection fails, check whether your network cable works with another machine. If it does, your network card causes the failure. If hubs or switches are included in your network setup, they may be faulty, as well.
If using a wireless connection, check whether the wireless link can be established by other machines. If not, contact the wireless network's administrator.
Once you have checked your basic network connectivity, try to find out which service is not responding. Gather the address information of all network servers needed in your setup. Either look them up in the appropriate YaST module or ask your system administrator. The following list gives some of the typical network servers involved in a setup together with the symptoms of an outage.
- DNS (Name Service)
A broken or malfunctioning name service affects the network's functionality in many ways. If the local machine relies on any network servers for authentication and these servers cannot be found due to name resolution issues, users would not even be able to log in. Machines in the network managed by a broken name server would not be able to «see» each other and communicate.
- NTP (Time Service)
A malfunctioning or completely broken NTP service could affect Kerberos authentication and X server functionality.
- NFS (File Service)
If any application needs data stored in an NFS mounted directory, it will not be able to start or function properly if this service was down or misconfigured. In the worst case scenario, a user's personal desktop configuration would not come up if their home directory containing the
.gconfor.kdesubdirectories could not be found due to a faulty NFS server.- Samba (File Service)
If any application needs data stored in a directory on a faulty Samba server, it will not be able to start or function properly.
- NIS (User Management)
If your openSUSE system relies on a faulty NIS server to provide the user data, users will not be able to log in to this machine.
- LDAP (User Management)
If your openSUSE system relies on a faulty LDAP server to provide the user data, users will not be able to log in to this machine.
- Kerberos (Authentication)
Authentication will not work and login to any machine fails.
- CUPS (Network Printing)
Users cannot print.
Check whether the network servers are running and whether your network setup allows you to establish a connection:
The debugging procedure described below only applies to a simple network server/client setup that does not involve any internal routing. It assumes both server and client are members of the same subnet without the need for additional routing.
Use ping
IP addressorhostname(replacehostnamewith the hostname of the server) to check whether each one of them is up and responding to the network. If this command is successful, it tells you that the host you were looking for is up and running and that the name service for your network is configured correctly.If ping fails with
destination host unreachable, either your system or the desired server is not properly configured or down. Check whether your system is reachable by running pingIP addressoryour_hostnamefrom another machine. If you can reach your machine from another machine, it is the server that is not running at all or not configured correctly.If ping fails with
unknown host, the name service is not configured correctly or the hostname used was incorrect. For further checks on this matter, refer to Шаг 4.b. If ping still fails, either your network card is not configured correctly or your network hardware is faulty.Use host
hostnameto check whether the hostname of the server you are trying to connect to is properly translated into an IP address and vice versa. If this command returns the IP address of this host, the name service is up and running. If the host command fails, check all network configuration files relating to name and address resolution on your host:/etc/resolv.confThis file is used to keep track of the name server and domain you are currently using. It can be modified manually or automatically adjusted by YaST or DHCP. Automatic adjustment is preferable. However, make sure that this file has the following structure and all network addresses and domain names are correct:
search
fully_qualified_domain_namenameserveripaddress_of_nameserverThis file can contain more than one name server address, but at least one of them must be correct to provide name resolution to your host. If needed, adjust this file using the YaST Network Setting module (Hostname/DNS tab).
If your network connection is handled via DHCP, enable DHCP to change hostname and name service information by selecting and in the YaST DNS and Hostname module.
/etc/nsswitch.confThis file tells Linux where to look for name service information. It should look like this:
 ...
hosts: files dns
networks: files dns
...
The
dnsentry is vital. It tells Linux to use an external name server. Normally, these entries are automatically managed by YaST, but it would be prudent to check.If all the relevant entries on the host are correct, let your system administrator check the DNS server configuration for the correct zone information. For detailed information about DNS, refer to Глава 11, The Domain Name System (↑Содержание). If you have made sure that the DNS configuration of your host and the DNS server are correct, proceed with checking the configuration of your network and network device.
If your system cannot establish a connection to a network server and you have excluded name service problems from the list of possible culprits, check the configuration of your network card.
Use the command ifconfig
network_device(executed asroot) to check whether this device was properly configured. Make sure that bothinet addressandMaskare configured correctly. An error in the IP address or a missing bit in your network mask would render your network configuration unusable. If necessary, perform this check on the server as well.If the name service and network hardware are properly configured and running, but some external network connections still get long time-outs or fail entirely, use traceroute
fully_qualified_domain_name(executed asroot) to track the network route these requests are taking. This command lists any gateway (hop) that a request from your machine passes on its way to its destination. It lists the response time of each hop and whether this hop is reachable at all. Use a combination of traceroute and ping to track down the culprit and let the administrators know.
Once you have identified the cause of your network trouble, you can resolve it yourself (if the problem is located on your machine) or let the system administrators of your network know about your findings so they can reconfigure the services or repair the necessary systems.
A.2.5.1. NetworkManager Problems
If you have a problem with network connectivity, narrow it down as described in Процедура A.6, «How to Identify Network Problems». If NetworkManager seems to be the culprit, proceed as follows to get logs providing hints on why NetworkManager fails:
Open a shell and log in as
root.Restart the NetworkManager:
rcnetwork restart -o nm
Open a web page, for example, http://www.opensuse.org as normal user to see, if you can connect.
Collect any information about the state of NetworkManager in
/var/log/NetworkManager.
For more information about NetworkManager, refer to Глава 21, Using NetworkManager (↑Содержание).
A.2.6. Data Problems
Data problems are when the machine may or may not boot properly but, in either case, it is clear that there is data corruption on the system and that the system needs to be recovered. These situations call for a backup of your critical data, enabling you to recover the system state from before your system failed. openSUSE offers dedicated YaST modules for system backup and restoration as well as a rescue system that can be used to recover a corrupted system from the outside.
A.2.6.1. Managing Partition Images
Sometimes you need to perform a backup from an entire partition or even hard disk. Linux comes with the dd tool which can create a exact copy of your disc. Combined with gzip you save some space.
Процедура A.7. Backing up and Restoring Harddisks
Start a Shell as user
root.Select your source device. Typically this is something like
/dev/sda(labeled asSOURCE).Decide where you want to store your image (labeled as
BACKUP_PATH). It must be different from your source device. In other words: if you make a backup from/dev/sda, your image file must not to be stored under/dev/sda.Run the commands to create a compressed image file:
dd if=/dev/
SOURCE| gzip > /BACKUP_PATH/image.gzRestore the hard disk with the following commands:
gzip -dc /
BACKUP_PATH/image.gz | dd of=/dev/SOURCE
If you only need a partition to backup, replace the
SOURCE placeholder with your respective
partition. In this case, your image file can lie on the same hard disk,
but on a different partition.
A.2.6.2. Backing Up Critical Data
System backups can be easily managed using the YaST System Backup module:
As
root, start YaST and select +.Create a backup profile holding all details needed for the backup, filename of the archive file, scope, and type of the backup:
Select +.
Enter a name for the archive.
Enter the path to the location of the backup if you want to keep a local backup. For your backup to be archived on a network server (via NFS), enter the IP address or name of the server and the directory that should hold your archive.
Determine the archive type and click .
Determine the backup options to use, such as whether files not belonging to any package should be backed up and whether a list of files should be displayed prior to creating the archive. Also determine whether changed files should be identified using the time-consuming MD5 mechanism.
Use to enter a dialog for the backup of entire hard disk areas. Currently, this option only applies to the Ext2 file system.
Finally, set the search constraints to exclude certain system areas from the backup area that do not need to be backed up, such as lock files or cache files. Add, edit, or delete items until your needs are met and leave with .
Once you have finished the profile settings, you can start the backup right away with or configure automatic backup. It is also possible to create other profiles tailored for various other purposes.
To configure automatic backup for a given profile, proceed as follows:
Select from the menu.
Select .
Determine the backup frequency. Choose , , or .
Determine the backup start time. These settings depend on the backup frequency selected.
Decide whether to keep old backups and how many should be kept. To receive an automatically generated status message of the backup process, check .
Click to apply your settings and have the first backup start at the time specified.
A.2.6.3. Restoring a System Backup
Use the YaST System Restoration module to restore the system configuration from a backup. Restore the entire backup or select specific components that were corrupted and need to be reset to their old state.
Start ++.
Enter the location of the backup file. This could be a local file, a network mounted file, or a file on a removable device, such as a floppy or a DVD. Then click .
The following dialog displays a summary of the archive properties, such as the filename, date of creation, type of backup, and optional comments.
Review the archived content by clicking . Clicking returns you to the dialog.
opens a dialog in which to fine-tune the restore process. Return to the dialog by clicking .
Click to open the view of packages to restore. Press to restore all files in the archive or use the various , , and buttons to fine-tune your selection. Only use the option if the RPM database is corrupted or deleted and this file is included in the backup.
After you click , the backup is restored. Click to leave the module after the restore process is completed.
A.2.7. Recovering a Corrupted System
There are several reasons why a system could fail to come up and run properly. A corrupted file system following a system crash, corrupted configuration files, or a corrupted boot loader configuration are the most common ones.
A.2.7.1. Using the Rescue System
openSUSE contains a rescue system. The rescue system is a small Linux system that can be loaded into a RAM disk and mounted as root file system, allowing you to access your Linux partitions from the outside. Using the rescue system, you can recover or modify any important aspect of your system:
Manipulate any type of configuration file.
Check the file system for defects and start automatic repair processes.
Access the installed system in a «change root» environment.
Check, modify, and reinstall the boot loader configuration.
Recover from a badly installed device driver or unusable kernel.
Resize partitions using the parted command. Find more information about this tool at the GNU Parted website http://www.gnu.org/software/parted/parted.html.
The rescue system can be loaded from various sources and locations. The simplest option is to boot the rescue system from the original installation medium:
Insert the installation medium into your DVD drive.
Reboot the system.
At the boot screen, press F4 and choose . Then choose from the main menu.
Enter
rootat theRescue:prompt. A password is not required.
If your hardware setup does not include a DVD drive, you can boot the
rescue system from a network source (including the
openSUSE FTP server). The following example applies to a
remote boot scenario—if using another boot medium, such as a DVD,
modify the info file accordingly and boot as you
would for a normal installation.
Enter the configuration of your PXE boot setup and add the lines
install=andprotocol://instsourcerescue=1. If you need to start the repair system, userepair=1instead. As with a normal installation,protocolstands for any of the supported network protocols (NFS, HTTP, FTP, etc.) andinstsourcefor the path to your network installation source.Boot the system using «Wake on LAN», as described in Раздел “Wake on LAN” (Глава 2, Remote Installation, ↑Содержание).
Enter
rootat theRescue:prompt. A password is not required.
Once you have entered the rescue system, you can make use of the virtual consoles that can be reached with Alt+F1 to Alt+F6.
A shell and many other useful utilities, such as the mount program, are
available in the /bin directory. The
sbin directory contains important file and network
utilities for reviewing and repairing the file system. This directory
also contains the most important binaries for system maintenance, such as
fdisk, mkfs, mkswap, mount, mount, init, and shutdown, and ifconfig, ip,
route, and netstat for maintaining the network. The directory
/usr/bin contains the vi editor, find, less, and
ssh.
To see the system messages, either use the command
dmesg or view the file
/var/log/messages.
A.2.7.1.1. Checking and Manipulating Configuration Files
As an example for a configuration that might be fixed using the rescue system, imagine you have a broken configuration file that prevents the system from booting properly. You can fix this using the rescue system.
To manipulate a configuration file, proceed as follows:
Start the rescue system using one of the methods described above.
To mount a root file system located under
/dev/sda6to the rescue system, use the following command:mount /dev/sda6 /mnt
All directories of the system are now located under
/mntChange the directory to the mounted root file system:
cd /mnt
Open the problematic configuration file in the vi editor. Adjust and save the configuration.
Unmount the root file system from the rescue system:
umount /mnt
Reboot the machine.
A.2.7.1.2. Repairing and Checking File Systems
Generally, file systems cannot be repaired on a running system. If you
encounter serious problems, you may not even be able to mount your root
file system and the system boot may end with a «kernel
panic». In this case, the only way is to repair the system from
the outside. The rescue system provides
all tools needed for a manual file system check or repair. It
contains the utilities to check and repair the btrfs,
ext2, ext3,
ext4, reiserfs,
xfs, dosfs, and
vfat file systems.
A.2.7.1.3. Accessing the Installed System
If you need to access the installed system from the rescue system, you need to do this in a change root environment. For example, to modify the boot loader configuration, or to execute a hardware configuration utility.
To set up a change root environment based on the installed system, proceed as follows:
First mount the root partition from the installed system and the device file system (change the device name to your current settings):
mount /dev/sda6 /mnt
mount --bind /dev /mnt/dev
Now you can «change root» into the new environment:
chroot /mnt
Then mount
/procand/sys:mount /proc mount /sys
Finally, mount the remaining partitions from the installed system:
mount -a
Now you have access to the installed system. Before rebooting the system, unmount the partitions with umount
-aand leave the «change root» environment with exit.
![[Warning]](admon/warning.png) | Limitations |
|---|---|
Although you have full access to the files and applications of the
installed system, there are some limitations. The kernel that is
running is the one that was booted with the rescue system, not with the
change root environment. It only supports essential hardware and it is
not possible to add kernel modules from the installed system unless the
kernel versions are exactly the same. Always check the version of the
currently running (rescue) kernel with uname -r and
then find out if a matching subdirectory exists in the
Also note that you leave the «change root» environment when you switch the console with Alt+F1 to Alt+F6. | |
A.2.7.1.4. Modifying and Reinstalling the Boot Loader
Sometimes a system cannot boot because the boot loader configuration is corrupted. The start-up routines cannot, for example, translate physical drives to the actual locations in the Linux file system without a working boot loader.
To check the boot loader configuration and reinstall the boot loader, proceed as follows:
Perform the necessary steps to access the installed system as described in Раздел A.2.7.1.3, «Accessing the Installed System».
Check whether the following files are correctly configured according to the GRUB configuration principles outlined in Глава 6, The Boot Loader GRUB (↑Содержание) and apply fixes if necessary.
/etc/grub.conf/boot/grub/device.map/boot/grub/menu.lst/etc/sysconfig/bootloader
Reinstall the boot loader using the following command sequence:
grub --batch < /etc/grub.conf
Unmount the partitions, log out from the «change root» environment, and reboot the system:
umount -a
exit
reboot
A.2.7.1.5. Fixing Kernel Installation
A kernel update may introduce a new bug which can impact the operation of your system. For example a driver for a piece of hardware in your system may be faulty, which prevents you from accessing and using it. In this case, revert to the last working kernel (if available on the system) or install the original kernel from the installation media.
| How to Keep Last Kernels after Update |
|---|---|
To prevent failures to boot after a faulty kernel update, use the
kernel multiversion feature and tell For example to always keep the last two kernels and the currently running one, add multiversion.kernels = latest,latest-1,running
to the | |
A similar case is when you need to reinstall or update a broken driver for a device not supported by openSUSE. For example when a hardware vendor uses a specific device, such as a hardware RAID controller, which needs a binary driver to be recognized by the operating system. The vendor typically releases a Driver Update Disk with the fixed or updated version of the required driver.
In both cases you need to access the installed system in the rescue mode and fix the kernel related problem, otherwise the system may fail to boot correctly:
Boot from the openSUSE installation media.
If you are recovering after a faulty kernel update, skip this step. If you need to use a driver update disk (DUD), press F6 to load the driver update after the boot menu appears, and choose the path or URL to the driver update and confirm with .
Choose from the boot menu and press Enter. If you chose to use DUD, you will be asked to specify where the driver update is stored.
Enter
rootat theRescue:prompt. A password is not required.Manually mount the target system and «change root» into the new environment. For more information, see Раздел A.2.7.1.3, «Accessing the Installed System».
If using DUD, install/reinstall/update the faulty device driver package. Always make sure the installed kernel version exactly matches the version of the driver you are installing.
If fixing faulty kernel update installation, you can install the original kernel from the installation media with the following procedure.
Identify your DVD device with hwinfo --cdrom and mount it with mount /dev/sr0 /mnt.
Navigate to the directory where your kernel files are stored on the DVD, for example cd /mnt/suse/x86_64/.
Install required
kernel-*,kernel-*-base, andkernel-*-extrapackages of your flavor with the rpm -i command.After the installation finishes, check that a new menu entry relevant for the newly installed kernel was added to the boot loader configuration file (
/boot/grub/menu.lstforgrub).
Update configuration files and reinitialize the boot loader if needed. For more information, see Раздел A.2.7.1.4, «Modifying and Reinstalling the Boot Loader»
Remove any bootable media from the system drive and reboot.
A.3. Правовая информация
Copyright© 2006– 2012 Novell, Inc. и Сообщество. Все права защищены.
Разрешается копировать, распространять и/или изменять этот документ в соответствии с условиями лицензии GNU Free Documentation License, версии 1.2 или (на ваше усмотрение) версии 1.3; с инвариантным разделом, в котором указываются информация об авторском праве и лицензия. Копия лицензии версии 1.2 включена в раздел, озаглавленный «GNU Free Documentation License».
Для торговых марок Novell обратитесь к списку Novell Trademark и Service Mark http://www.novell.com/company/legal/trademarks/tmlist.html. Linux* — зарегистрированная торговая марка Линуса Торвальдса. Все другие торговые марки являются собственностью их владельцев. Знаки (®, ™ и другие) используются для обозначения торговых марок Novell; звездочкой (*) обозначены товарные марки третьих лиц.
Вся информация в этой книге была составлена с предельным вниманием к деталям. Однако, это не гарантирует абсолютной точности. Ни авторы из Novell, Inc., SUSE LINUX Products GmbH, ни переводчики, не несут ответственности за возможные ошибки и их последствия.
A.4. GNU Free Documentation License
Version 1.2, November 2002
Copyright (C) 2000,2001,2002 Free Software Foundation, Inc. 59 Temple Place, Suite 330, Boston, MA 02111-1307 USA
Everyone is permitted to copy and distribute verbatim copies of this license document, but changing it is not allowed.
A.4.1. PREAMBLE
The purpose of this License is to make a manual, textbook, or other functional and useful document “free” in the sense of freedom: to assure everyone the effective freedom to copy and redistribute it, with or without modifying it, either commercially or noncommercially. Secondarily, this License preserves for the author and publisher a way to get credit for their work, while not being considered responsible for modifications made by others.
This License is a kind of «copyleft», which means that derivative works of the document must themselves be free in the same sense. It complements the GNU General Public License, which is a copyleft license designed for free software.
We have designed this License in order to use it for manuals for free software, because free software needs free documentation: a free program should come with manuals providing the same freedoms that the software does. But this License is not limited to software manuals; it can be used for any textual work, regardless of subject matter or whether it is published as a printed book. We recommend this License principally for works whose purpose is instruction or reference.
A.4.2. APPLICABILITY AND DEFINITIONS
This License applies to any manual or other work, in any medium, that contains a notice placed by the copyright holder saying it can be distributed under the terms of this License. Such a notice grants a world-wide, royalty-free license, unlimited in duration, to use that work under the conditions stated herein. The «Document», below, refers to any such manual or work. Any member of the public is a licensee, and is addressed as «you». You accept the license if you copy, modify or distribute the work in a way requiring permission under copyright law.
A «Modified Version» of the Document means any work containing the Document or a portion of it, either copied verbatim, or with modifications and/or translated into another language.
A «Secondary Section» is a named appendix or a front-matter section of the Document that deals exclusively with the relationship of the publishers or authors of the Document to the Document’s overall subject (or to related matters) and contains nothing that could fall directly within that overall subject. (Thus, if the Document is in part a textbook of mathematics, a Secondary Section may not explain any mathematics.) The relationship could be a matter of historical connection with the subject or with related matters, or of legal, commercial, philosophical, ethical or political position regarding them.
The «Invariant Sections» are certain Secondary Sections whose titles are designated, as being those of Invariant Sections, in the notice that says that the Document is released under this License. If a section does not fit the above definition of Secondary then it is not allowed to be designated as Invariant. The Document may contain zero Invariant Sections. If the Document does not identify any Invariant Sections then there are none.
The «Cover Texts» are certain short passages of text that are listed, as Front-Cover Texts or Back-Cover Texts, in the notice that says that the Document is released under this License. A Front-Cover Text may be at most 5 words, and a Back-Cover Text may be at most 25 words.
A «Transparent» copy of the Document means a machine-readable copy, represented in a format whose specification is available to the general public, that is suitable for revising the document straightforwardly with generic text editors or (for images composed of pixels) generic paint programs or (for drawings) some widely available drawing editor, and that is suitable for input to text formatters or for automatic translation to a variety of formats suitable for input to text formatters. A copy made in an otherwise Transparent file format whose markup, or absence of markup, has been arranged to thwart or discourage subsequent modification by readers is not Transparent. An image format is not Transparent if used for any substantial amount of text. A copy that is not «Transparent» is called «Opaque».
Examples of suitable formats for Transparent copies include plain ASCII without markup, Texinfo input format, LaTeX input format, SGML or XML using a publicly available DTD, and standard-conforming simple HTML, PostScript or PDF designed for human modification. Examples of transparent image formats include PNG, XCF and JPG. Opaque formats include proprietary formats that can be read and edited only by proprietary word processors, SGML or XML for which the DTD and/or processing tools are not generally available, and the machine-generated HTML, PostScript or PDF produced by some word processors for output purposes only.
The «Title Page» means, for a printed book, the title page itself, plus such following pages as are needed to hold, legibly, the material this License requires to appear in the title page. For works in formats which do not have any title page as such, «Title Page» means the text near the most prominent appearance of the work’s title, preceding the beginning of the body of the text.
A section «Entitled XYZ» means a named subunit of the Document whose title either is precisely XYZ or contains XYZ in parentheses following text that translates XYZ in another language. (Here XYZ stands for a specific section name mentioned below, such as «Acknowledgements», «Dedications», «Endorsements», or «History».) To «Preserve the Title» of such a section when you modify the Document means that it remains a section «Entitled XYZ» according to this definition.
The Document may include Warranty Disclaimers next to the notice which states that this License applies to the Document. These Warranty Disclaimers are considered to be included by reference in this License, but only as regards disclaiming warranties: any other implication that these Warranty Disclaimers may have is void and has no effect on the meaning of this License.
A.4.3. VERBATIM COPYING
You may copy and distribute the Document in any medium, either commercially or noncommercially, provided that this License, the copyright notices, and the license notice saying this License applies to the Document are reproduced in all copies, and that you add no other conditions whatsoever to those of this License. You may not use technical measures to obstruct or control the reading or further copying of the copies you make or distribute. However, you may accept compensation in exchange for copies. If you distribute a large enough number of copies you must also follow the conditions in section 3.
You may also lend copies, under the same conditions stated above, and you may publicly display copies.
A.4.4. COPYING IN QUANTITY
If you publish printed copies (or copies in media that commonly have printed covers) of the Document, numbering more than 100, and the Document’s license notice requires Cover Texts, you must enclose the copies in covers that carry, clearly and legibly, all these Cover Texts: Front-Cover Texts on the front cover, and Back-Cover Texts on the back cover. Both covers must also clearly and legibly identify you as the publisher of these copies. The front cover must present the full title with all words of the title equally prominent and visible. You may add other material on the covers in addition. Copying with changes limited to the covers, as long as they preserve the title of the Document and satisfy these conditions, can be treated as verbatim copying in other respects.
If the required texts for either cover are too voluminous to fit legibly, you should put the first ones listed (as many as fit reasonably) on the actual cover, and continue the rest onto adjacent pages.
If you publish or distribute Opaque copies of the Document numbering more than 100, you must either include a machine-readable Transparent copy along with each Opaque copy, or state in or with each Opaque copy a computer-network location from which the general network-using public has access to download using public-standard network protocols a complete Transparent copy of the Document, free of added material. If you use the latter option, you must take reasonably prudent steps, when you begin distribution of Opaque copies in quantity, to ensure that this Transparent copy will remain thus accessible at the stated location until at least one year after the last time you distribute an Opaque copy (directly or through your agents or retailers) of that edition to the public.
It is requested, but not required, that you contact the authors of the Document well before redistributing any large number of copies, to give them a chance to provide you with an updated version of the Document.
A.4.5. MODIFICATIONS
You may copy and distribute a Modified Version of the Document under the conditions of sections 2 and 3 above, provided that you release the Modified Version under precisely this License, with the Modified Version filling the role of the Document, thus licensing distribution and modification of the Modified Version to whoever possesses a copy of it. In addition, you must do these things in the Modified Version:
A. Use in the Title Page (and on the covers, if any) a title distinct from that of the Document, and from those of previous versions (which should, if there were any, be listed in the History section of the Document). You may use the same title as a previous version if the original publisher of that version gives permission.
B. List on the Title Page, as authors, one or more persons or entities responsible for authorship of the modifications in the Modified Version, together with at least five of the principal authors of the Document (all of its principal authors, if it has fewer than five), unless they release you from this requirement.
C. State on the Title page the name of the publisher of the Modified Version, as the publisher.
D. Preserve all the copyright notices of the Document.
E. Add an appropriate copyright notice for your modifications adjacent to the other copyright notices.
F. Include, immediately after the copyright notices, a license notice giving the public permission to use the Modified Version under the terms of this License, in the form shown in the Addendum below.
G. Preserve in that license notice the full lists of Invariant Sections and required Cover Texts given in the Document’s license notice.
H. Include an unaltered copy of this License.
I. Preserve the section Entitled «History», Preserve its Title, and add to it an item stating at least the title, year, new authors, and publisher of the Modified Version as given on the Title Page. If there is no section Entitled «History» in the Document, create one stating the title, year, authors, and publisher of the Document as given on its Title Page, then add an item describing the Modified Version as stated in the previous sentence.
J. Preserve the network location, if any, given in the Document for public access to a Transparent copy of the Document, and likewise the network locations given in the Document for previous versions it was based on. These may be placed in the «History» section. You may omit a network location for a work that was published at least four years before the Document itself, or if the original publisher of the version it refers to gives permission.
K. For any section Entitled «Acknowledgements» or «Dedications», Preserve the Title of the section, and preserve in the section all the substance and tone of each of the contributor acknowledgements and/or dedications given therein.
L. Preserve all the Invariant Sections of the Document, unaltered in their text and in their titles. Section numbers or the equivalent are not considered part of the section titles.
M. Delete any section Entitled «Endorsements». Such a section may not be included in the Modified Version.
N. Do not retitle any existing section to be Entitled «Endorsements» or to conflict in title with any Invariant Section.
O. Preserve any Warranty Disclaimers.
If the Modified Version includes new front-matter sections or appendices that qualify as Secondary Sections and contain no material copied from the Document, you may at your option designate some or all of these sections as invariant. To do this, add their titles to the list of Invariant Sections in the Modified Version’s license notice. These titles must be distinct from any other section titles.
You may add a section Entitled «Endorsements», provided it contains nothing but endorsements of your Modified Version by various parties--for example, statements of peer review or that the text has been approved by an organization as the authoritative definition of a standard.
You may add a passage of up to five words as a Front-Cover Text, and a passage of up to 25 words as a Back-Cover Text, to the end of the list of Cover Texts in the Modified Version. Only one passage of Front-Cover Text and one of Back-Cover Text may be added by (or through arrangements made by) any one entity. If the Document already includes a cover text for the same cover, previously added by you or by arrangement made by the same entity you are acting on behalf of, you may not add another; but you may replace the old one, on explicit permission from the previous publisher that added the old one.
The author(s) and publisher(s) of the Document do not by this License give permission to use their names for publicity for or to assert or imply endorsement of any Modified Version.
A.4.6. COMBINING DOCUMENTS
You may combine the Document with other documents released under this License, under the terms defined in section 4 above for modified versions, provided that you include in the combination all of the Invariant Sections of all of the original documents, unmodified, and list them all as Invariant Sections of your combined work in its license notice, and that you preserve all their Warranty Disclaimers.
The combined work need only contain one copy of this License, and multiple identical Invariant Sections may be replaced with a single copy. If there are multiple Invariant Sections with the same name but different contents, make the title of each such section unique by adding at the end of it, in parentheses, the name of the original author or publisher of that section if known, or else a unique number. Make the same adjustment to the section titles in the list of Invariant Sections in the license notice of the combined work.
In the combination, you must combine any sections Entitled «History» in the various original documents, forming one section Entitled «History»; likewise combine any sections Entitled «Acknowledgements», and any sections Entitled «Dedications». You must delete all sections Entitled «Endorsements».
A.4.7. COLLECTIONS OF DOCUMENTS
You may make a collection consisting of the Document and other documents released under this License, and replace the individual copies of this License in the various documents with a single copy that is included in the collection, provided that you follow the rules of this License for verbatim copying of each of the documents in all other respects.
You may extract a single document from such a collection, and distribute it individually under this License, provided you insert a copy of this License into the extracted document, and follow this License in all other respects regarding verbatim copying of that document.
A.4.8. AGGREGATION WITH INDEPENDENT WORKS
A compilation of the Document or its derivatives with other separate and independent documents or works, in or on a volume of a storage or distribution medium, is called an “aggregate” if the copyright resulting from the compilation is not used to limit the legal rights of the compilation’s users beyond what the individual works permit. When the Document is included in an aggregate, this License does not apply to the other works in the aggregate which are not themselves derivative works of the Document.
If the Cover Text requirement of section 3 is applicable to these copies of the Document, then if the Document is less than one half of the entire aggregate, the Document’s Cover Texts may be placed on covers that bracket the Document within the aggregate, or the electronic equivalent of covers if the Document is in electronic form. Otherwise they must appear on printed covers that bracket the whole aggregate.
A.4.9. TRANSLATION
Translation is considered a kind of modification, so you may distribute translations of the Document under the terms of section 4. Replacing Invariant Sections with translations requires special permission from their copyright holders, but you may include translations of some or all Invariant Sections in addition to the original versions of these Invariant Sections. You may include a translation of this License, and all the license notices in the Document, and any Warranty Disclaimers, provided that you also include the original English version of this License and the original versions of those notices and disclaimers. In case of a disagreement between the translation and the original version of this License or a notice or disclaimer, the original version will prevail.
If a section in the Document is Entitled «Acknowledgements», «Dedications», or «History», the requirement (section 4) to Preserve its Title (section 1) will typically require changing the actual title.
A.4.10. TERMINATION
You may not copy, modify, sublicense, or distribute the Document except as expressly provided for under this License. Any other attempt to copy, modify, sublicense or distribute the Document is void, and will automatically terminate your rights under this License. However, parties who have received copies, or rights, from you under this License will not have their licenses terminated so long as such parties remain in full compliance.
A.4.11. FUTURE REVISIONS OF THIS LICENSE
The Free Software Foundation may publish new, revised versions of the GNU Free Documentation License from time to time. Such new versions will be similar in spirit to the present version, but may differ in detail to address new problems or concerns. See http://www.gnu.org/copyleft/.
Each version of the License is given a distinguishing version number. If the Document specifies that a particular numbered version of this License «or any later version» applies to it, you have the option of following the terms and conditions either of that specified version or of any later version that has been published (not as a draft) by the Free Software Foundation. If the Document does not specify a version number of this License, you may choose any version ever published (not as a draft) by the Free Software Foundation.
A.4.12. ADDENDUM: How to use this License for your documents
To use this License in a document you have written, include a copy of the License in the document and put the following copyright and license notices just after the title page:
   Copyright (c) YEAR YOUR NAME.
   Permission is granted to copy, distribute and/or modify this document
   under the terms of the GNU Free Documentation License, Version 1.2
   or any later version published by the Free Software Foundation;
   with no Invariant Sections, no Front-Cover Texts, and no Back-Cover Texts.
   A copy of the license is included in the section entitled “GNU
   Free Documentation License”.
If you have Invariant Sections, Front-Cover Texts and Back-Cover Texts, replace the “with...Texts.” line with this:
   with the Invariant Sections being LIST THEIR TITLES, with the
   Front-Cover Texts being LIST, and with the Back-Cover Texts being LIST.
If you have Invariant Sections without Cover Texts, or some other combination of the three, merge those two alternatives to suit the situation.
If your document contains nontrivial examples of program code, we recommend releasing these examples in parallel under your choice of free software license, such as the GNU General Public License, to permit their use in free software.