Глава 3. GNOME Быстрый старт
Содержание
- 3.1. Getting Started
- 3.2. Starting Programs
- 3.3. Handling Media
- 3.4. Customizing Your Desktop
- 3.5. Applying Desktop Effects
- 3.6. Using Virtual Desktops
- 3.7. Managing Files and Folders
- 3.8. Browsing the Internet with Firefox
- 3.9. Managing Passwords
- 3.10. E-Mailing and Calendaring
- 3.11. Instant Messaging with Empathy
- 3.12. Starting LibreOffice
- 3.13. Viewing PDF Files and Other Documents
- 3.14. Searching for Data
- 3.15. Creating a CD or DVD
- 3.16. Managing Your Digital Image Collection
- 3.17. Managing Your Music and Videos
- 3.18. Logging Out
- 3.19. For More Information
Аннотация
openSUSE® provides the tools that Linux* users require in their daily activities. It comes with an easy-to-use graphical environment, the GNOME* desktop, that communicates with the underlying Linux system, to let you access and manage files, folders, and programs. openSUSE provides an integrated suite of applications for a wide range of office, multimedia, and Internet activities. The LibreOffice suite, which allows you to edit and save files in a number of formats, is also included. The office suite is available for several operating systems. Therefore, you can use the same data across different computing platforms.
3.1. Getting Started
When you start your system, you are usually prompted to enter your username and password. If someone else installed your system, check with your system administrator for your username and password.
After logging in to GNOME for the first time, you see the GNOME desktop, offering the following basic elements:
 |
Desktop Icons: Access programs and features on your system by double-clicking an icon. Right-click an icon to get additional menus and options. By default, the desktop features several key icons, including your personal folder and a trash can for deleted items. Other icons representing devices on your computer, such as CD drives or USB flash disks, may also be present on the desktop, and you can add as many icons on your desktop as you like. If you double-click your folder, the Nautilus file manager starts and displays the contents of your home directory.
Bottom Panel: The desktop includes a panel at the bottom of the screen. This panel contains the menu, the Tomboy Notes applet, a taskbar to display buttons for all currently running applications, and the system tray. You can also add applications and applets to the panel for easy access.
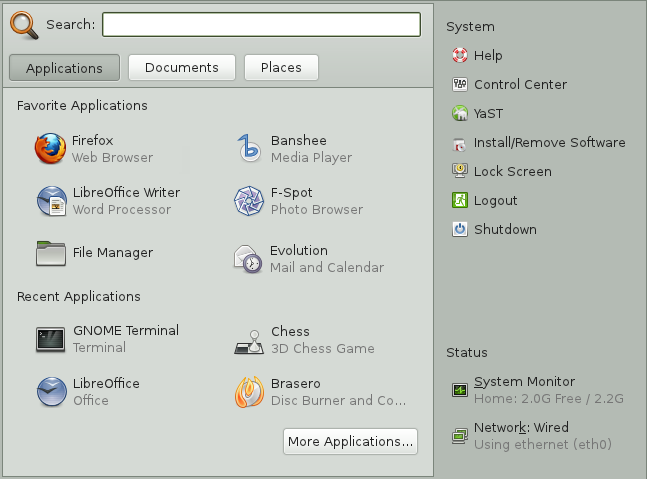
Main Menu: Click on the left side of the bottom panel to open the main menu. Commonly used applications appear in the main menu along with recently used applications. Click the button to display your recent documents, or click the button to display your favorite places (such as your home directory, your desktop, or available network servers). Click to access additional applications, listed in categories. Use the options on the right to access help, open the Центр управления GNOME, run YaST, install additional software, lock your screen, log out of the desktop, shut down the system, or check the status of your hard drive and network connections.
System Tray: The right side of the bottom panel shows some smaller icons, including the system clock that displays the current date and time, the Workspace Switcher, the volume control, and icons for several other helper applications.
Taskbar: By default, all applications running on the current desktop are displayed in the taskbar (the area in the middle of the panel between the Computer button and the system tray). You can access these applications by clicking their names in the taskbar. Right-click the application's name to see options for moving, restoring, or minimizing the window.
Desktop Menu: Right-click an empty spot on the desktop to display a menu with various options. Click to create a new folder on the desktop. Use to create a launcher icon for an application. Provide the name of the application and the command for starting it, then select an icon to represent it. You can also change the desktop background, open a terminal, create a document, and align desktop icons.
3.1.1. Modifying Desktop Panels
The bottom panel can be customized to meet your individual needs, and additional panels can be added and configured to further personalize your desktop.
To add a new panel, right-click a blank space in the bottom panel and select . To delete a panel, right-click a blank space in the panel and select . openSUSE requires that at least one panel is left on the desktop.
3.1.2. Adding and Removing Panel Icons
3.2. Starting Programs
Start programs from the or from the command line, using a shell or the . Additionally, you can start programs from the desktop or the panel by left-clicking the program icon once.
3.2.1. Using the Main Menu
To run a program in openSUSE, click on the panel to open the main menu screen. If the program you want does not appear in the main menu screen, click to view a list of all available applications grouped in categories. You can also limit the list to show only applications with a specific name by entering all or part of the name into the field. Click an entry in the list to start the corresponding program.
 |
You can also add an icon to your panel that opens a more traditional version of the main menu. Right-click a blank space on the panel, select , then double-click .
If you already know the name of an application but are not sure how to start it from the main menu, use the field in the main menu. Click , type a portion of the application name in the field, then press Enter. If the application is installed on your system, the name of the application appears in the search dialog box. Click the name to start the program.
3.2.2. Using the Run Application Dialog
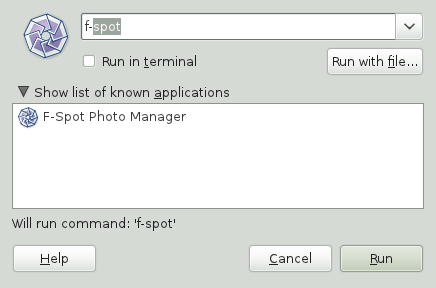
Press Alt+F2 to open the dialog. Type a command, for example, f-spot, and press Enter or click to start the application. The command to start the application is often (but not always) the application name written in lowercase.
 |
3.3. Handling Media
If you insert a CD or DVD into your drive or plug in a pluggable device (for example, a USB stick or removable hard disk), GNOME opens Nautilus and shows the content of the media.
3.4. Customizing Your Desktop
Easily add, delete, and create shortcut icons on your desktop. You can also change icon properties and the desktop background to suit your needs.
3.4.1. Adding Program Icons to Your Desktop
Click .
Browse to the desired program.
Click and drag the icon to the desktop and position it as desired.
To delete an icon from your desktop, simply click the program icon and press the Delete key on your keyboard.
3.4.2. Changing the Desktop Background
Right-click the background.
Select .
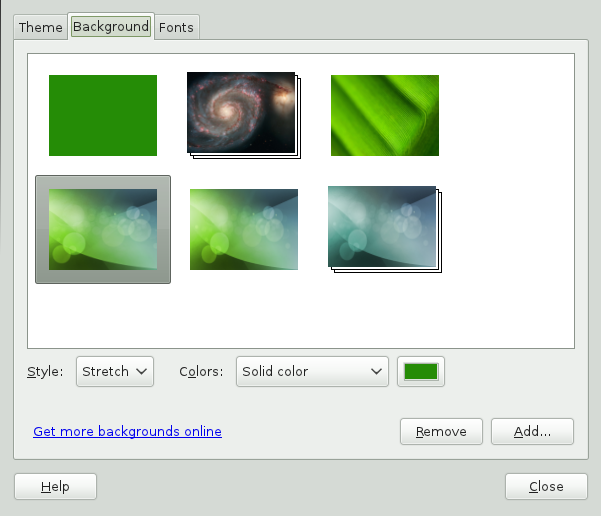
To select a wallpaper from the pre-installed images, browse to and select the desired image. After you select it, the background changes automatically.
To add an image, select , browse to the desired image, then click .
To display a colored background, select the solid color rectangle from the top of the list; then, from , select the fill pattern and the desired colors.
Click .
3.4.3. Using the Центр управления GNOME
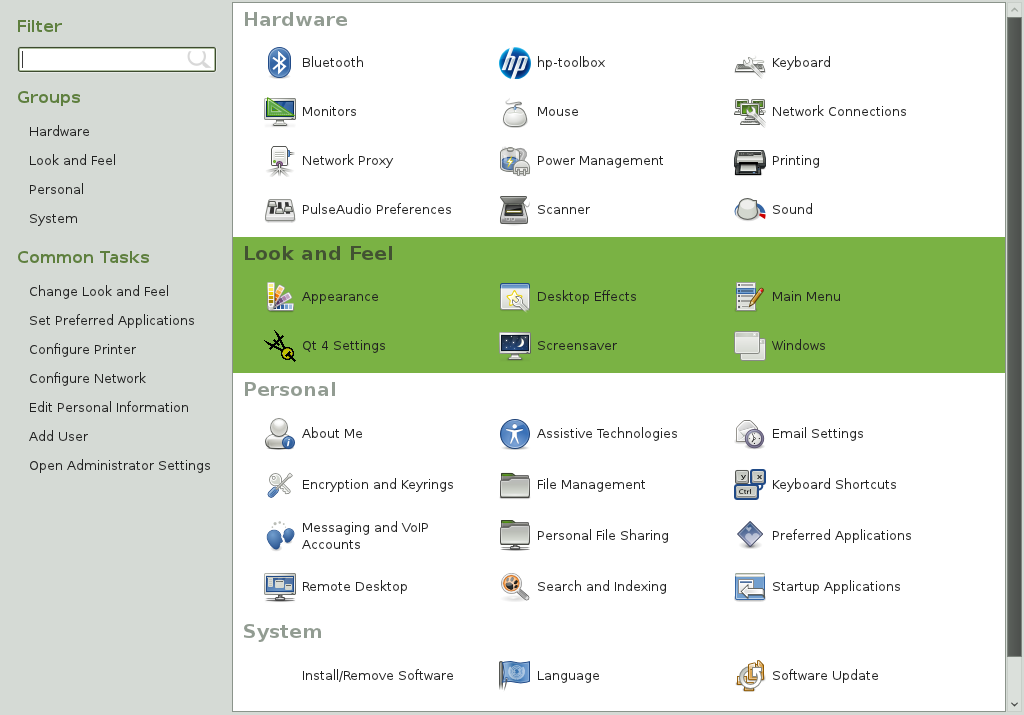
In addition to letting you change individual desktop elements, GNOME lets you extensively personalize your desktop. You can find more settings to adjust the overall appearance and behavior of your desktop in the Центр управления GNOME. There, you can also change fonts, keyboard and mouse configurations, regional and language settings, parameters for your Internet and network usage, and more.
To start the Control Center, click , then click on the right of the main menu.
 |
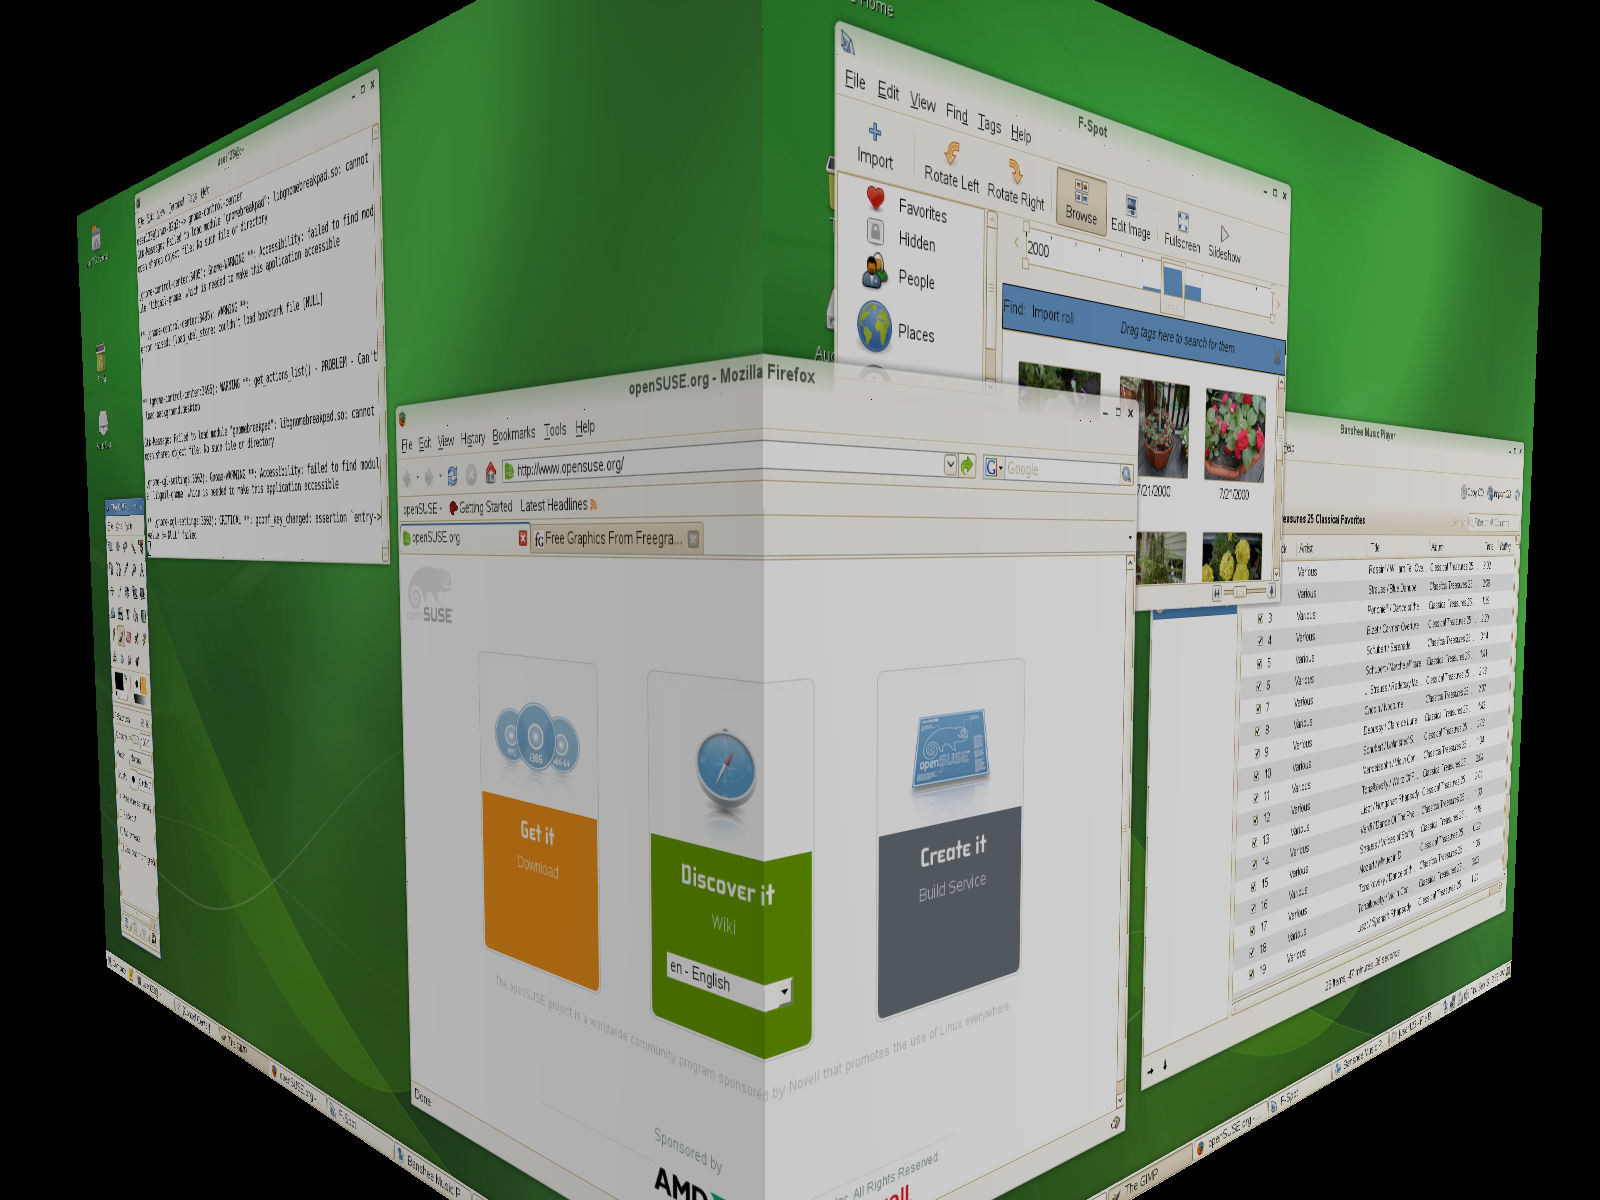
3.5. Applying Desktop Effects
If your computer supports a 3D graphics card with Xgl, you can use graphical effects like turning your desktop into a rotating 3D cube, enabling translucent or transparent windows, and zooming in and out of the desktop screen. You can also use other window effects such as shadows, fading, and transformations. If you do not have a 3D graphics card, some effects may be disabled or reduce the performance of your system. If the performance of your system is too low, disable the compositing effect for your current session with Alt+Shift+F12.
 |
To configure the effects on your desktop, proceed as follows:
Start the personal settings window as described in Раздел 3.4.3, «Using the Центр управления GNOME».
Select + and choose . If your graphic card does not support 3D, you will be notified.
Select the effects in one of the tabs.
3.6. Using Virtual Desktops
The desktop environment allows you to organize your programs and tasks on several virtual desktops. If you often run a lot of programs simultaneously, this minimizes the number of windows to arrange on your screen. You might, for example, use one desktop for e-mailing and calendaring and another for word processing and graphics applications.
Процедура 3.1. Moving an Application to Another Virtual Desktop
You can display a running application on one or all virtual desktops, or move it to other desktops.
Open the application.
Right-click the title bar of the application.
Click .
Select the desktop on which to place the application.
To switch between desktops, click the desired desktop in the pager in the panel.
Процедура 3.2. Adding Additional Virtual Desktops
Some users might need more desktops than are provided by default. To add additional desktops, do the following:
Right-click the pager in the panel and select . A configuration dialog appears:
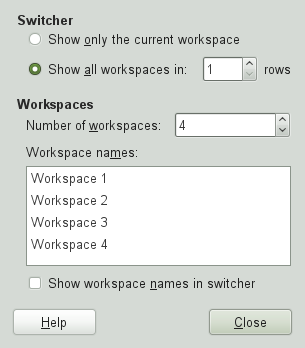
Decrease or increase the .
If you want to change the names of the desktops double click on the list entries and enter the new names.
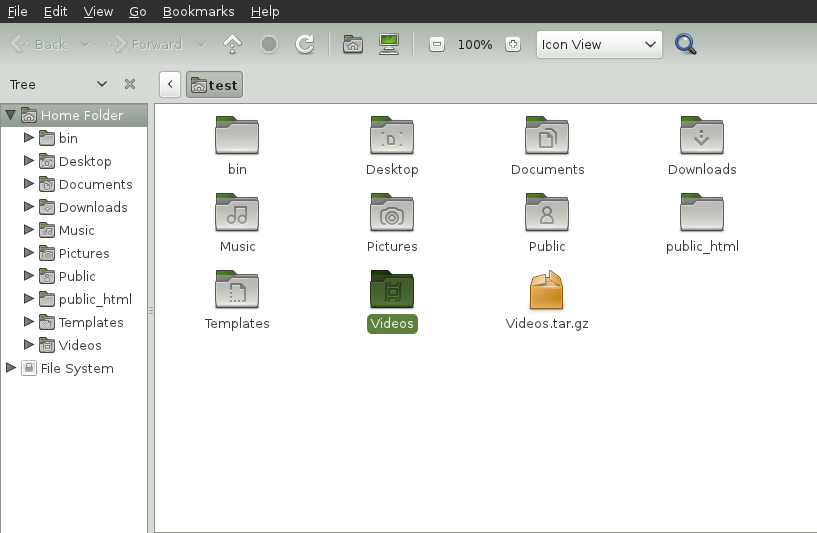
3.7. Managing Files and Folders
Use the Nautilus File Manager to create and view folders and documents, run scripts, and create CDs of your data. To open Nautilus, double-click your home directory icon on the desktop. You see the contents of your home directory.
 |
The elements of the Nautilus window include the following:
Menu. Lets you perform most tasks.
Toolbar. Lets you quickly navigate among files and folders, and provides access to files and folders.
Location Bar. Lets you locate files, folders, and URI sites. If you prefer text based location display to the button based one, select +.
Side Pane. Lets you navigate or display information about the selected file or folder. Use the drop-down list to customize what is shown in the pane. The list includes ways to view information about files, perform actions on files, attach emblems to files, view a history of recently visited sites, and display your files in the tree system.
View Pane. Displays folders and files. Use the options on the menu to increase or decrease the size of content in the view pane and to display items as a list or as icons.
Status Bar. Displays the number of items in a folder and gives the available free space. When a file is selected, the status bar displays the filename and size.
3.7.1. Archiving Folders
If you have files you have not used recently but want to keep on your computer, you can compress the files into a tape archive (TAR) format.
In the Nautilus view pane, right-click the folder you want to archive and select .
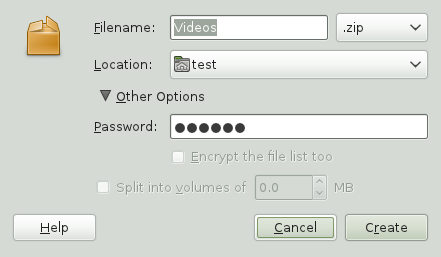
Accept the default archive filename or provide a new name.
Select a file extension from the drop-down list. Use
tar.gzfor the most common archive form. Usezipif you need to protect the archive with a password.Specify a location for the archive file, then click .
To extract an archived file, right-click the file and select .
3.7.2. Using Bookmarks
Use the Nautilus bookmarks feature to mark your favorite folders.
Open the folder you want to create a bookmark for.
Click +. The bookmark is added to the list, with the folder name as the bookmark name.
To select an item from your bookmarks list, click , then click the desired bookmark in the list.
You can also organize your bookmarks list by clicking + and making your selections in the dialog box.
 |
To change the order of your bookmarks, click a bookmark shown in the dialog and drag it to the desired location.
3.8. Browsing the Internet with Firefox
Firefox* is one of the most popular Web browsers. It has all the familiarity of other browsers, plus added features such as security and privacy tools.
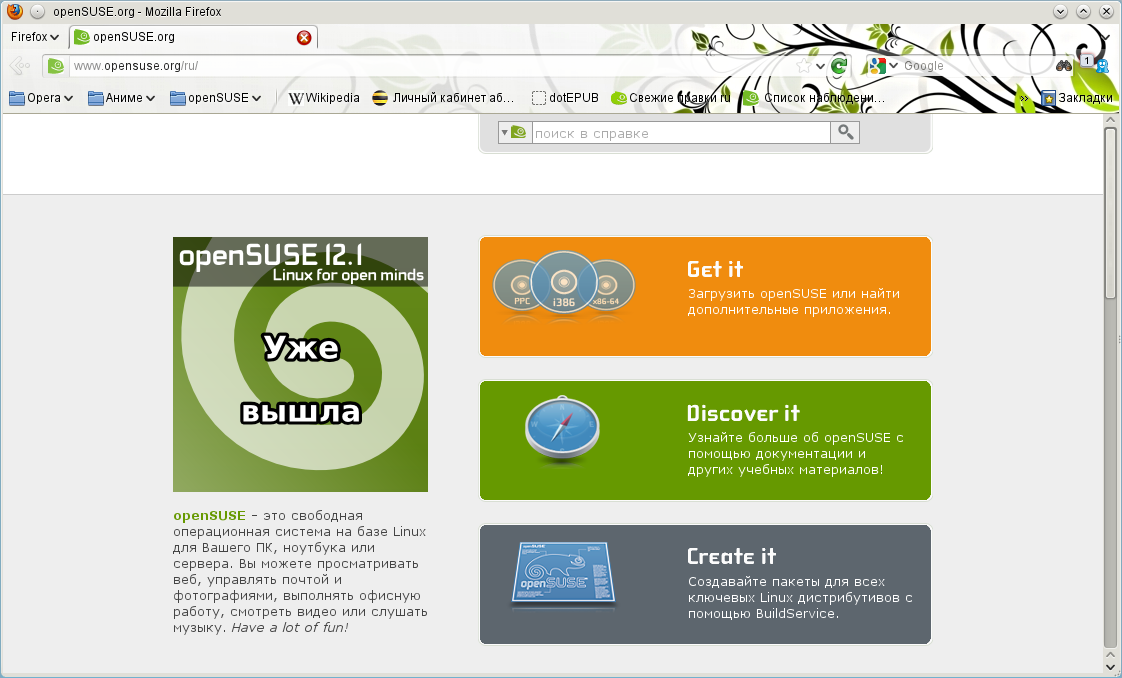 |
To start Firefox, click +.
With features like tabbed browsing, pop-up window blocking, and download and image management, Firefox combines the latest Web technologies. Its easy access to different search engines helps you find the information you need. Enter a URL in the location bar to start browsing.
To open a new empty tab in Firefox, press Ctrl+T or the «+» button next to the last tab . Type a new URL to browse. To open a link in a new tab, click the link with your middle mouse button. Right-click a tab to access more tab options. You can create a new tab, reload one or all existing tabs, or close a single tab or all tabs. You can also change the sequence of the tabs by dragging and dropping them to a new position.
3.8.1. Finding Information
To start a search on the Web type your search keywords in the integrated search box on the right of the location bar, then press Enter. The results are displayed in the active window or tab.
To use a different search engine than the default, click the icon in the search box to open a list of other search engines.
Click the desired engine, then press Enter to start the search.
To search the current Web page for words, press Ctrl+F to open the bar at the bottom of the window. Enter your search keyword there and use the buttons to the right of the box to search in different directions or to select all hits in the text.
3.8.2. Downloading Files from the Web
If you download a file with Firefox, the Firefox download manager starts
and saves this file to the folder configured in Firefox
. By default, the
Downloads folder in your home directory is the
destination for downloaded files. Firefox shows your finished downloads
in the window.
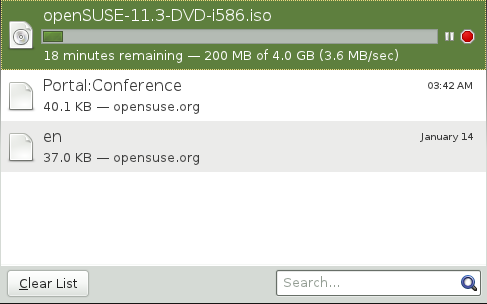 |
Open the downloaded files directly from the window or from the destination folder. To clean up the history of downloaded files, click .
3.8.3. Configuring Preferences
To adjust the default download folder or to activate or modify the pop-up blocking feature, click +.
 |
Here also configure many other settings such as appearance, language, privacy, and tab options. Click the icons and set the options on each page according to your preferences. Click to apply the changes.
3.9. Managing Passwords
GNOME allows you to store your passwords and encryption keys in a keyring. This is useful if you want to store passwords for different web sites.
To create a new keyring, proceed as follows:
Press Alt+F2 and enter seahorse.
Select +.
Choose and proceed with .
Enter a name for your keyring. Then, a dialog box opens.
Enter your password, confirm the password, and click .
You can create as many keyrings as you like. For example, you can create one for private and one for business. To store passwords in your keyring, proceed as follows:
Press Alt+F2 and enter seahorse.
Select +.
Choose and proceed with .
Select your keyring, enter description and password.
Finish with .
3.10. E-Mailing and Calendaring
For reading and managing your mail and events, openSUSE offers you Evolution™, a groupware program that makes it easy to store, organize, and retrieve your personal information.
Evolution seamlessly combines an e-mail, a calendar, an address book, and a task list in one easy-to-use application. With its extensive support for communications and data interchange standards, Evolution can work with existing corporate networks and applications, including Microsoft* Exchange.
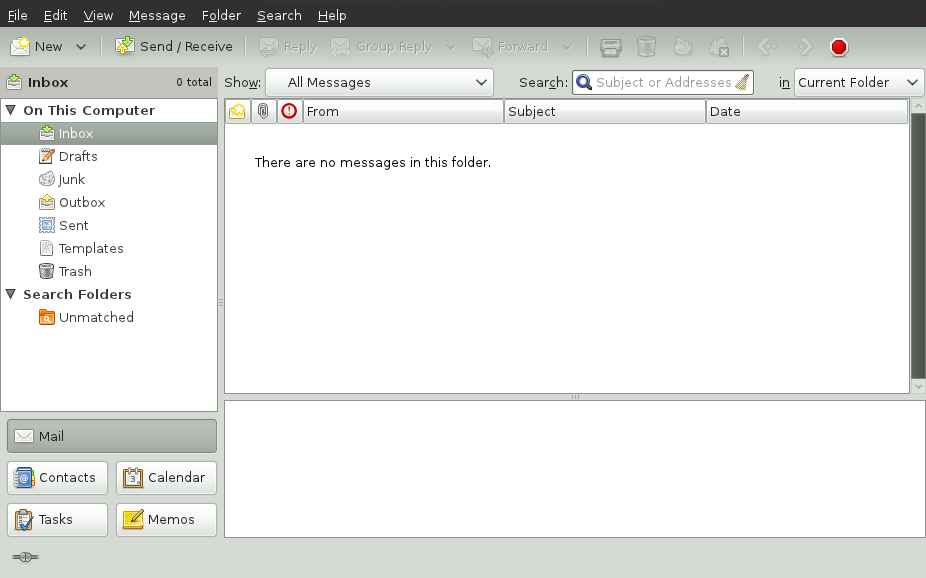 |
To start Evolution, click +.
The first time you start it, Evolution prompts you with a few questions as it sets up a mail account and helps you import mail from your old mail client. It shows you how many new messages you have and lists upcoming appointments and tasks, as well as the current weather and news from news feeds. The calendar, address book, and mail tools are available in the shortcut bar on the left.
Press Ctrl+N to open a new item for whatever part of Evolution you are working in. In mail, this creates a new message. If you are in the address book, Ctrl+N creates a new contact card, and in the calendar, it creates a new appointment.
For more information on using Evolution, click + in any Evolution window.
3.11. Instant Messaging with Empathy
Empathy is a multiprotocol instant messaging (IM) client. It is compatible with AOL* Instant Messenger (AIM), Google Talk, GroupWise® Messenger, ICQ, IRC, MSN Messenger, Jabber/XMPP, Yahoo!*, and other networks.
With Empathy, you can log in to multiple accounts on multiple IM networks simultaneously. Empathy also supports many features of the various networks, such as video chat, file transfer, away messages, and typing notification.
To start Empathy, click +++, or press Alt+F2 and enter empathy.
To add an account to Empathy, either use the initial configuration wizard, or select +. Click and select the protocol you want to use, and type your login information in the appropriate fields. Click to activate you IM account. Finally click to start chatting with your friends.
Add contacts by clicking +. Select account, identifier and alias information relevant for the new contact and confirm with . However, you must be online and connected to the selected messaging service to add a contact to your list.
To start a chat, double-click the desired contact and type your message in the lower part of the chatting window. Press Enter to send the message. The upper part of the window displays the messages you have sent and received.
3.12. Starting LibreOffice
The LibreOffice office suite offers a complete set of office tools, including word processing, spreadsheet, presentation, vector drawing, and database components. Because LibreOffice is available for a number of operating systems, you can use the same data across multiple platforms.
To start LibreOffice, click +. To create a new document, click +, then choose the type of document you want to create. To open an existing document, click , then select the file you want from the file system.
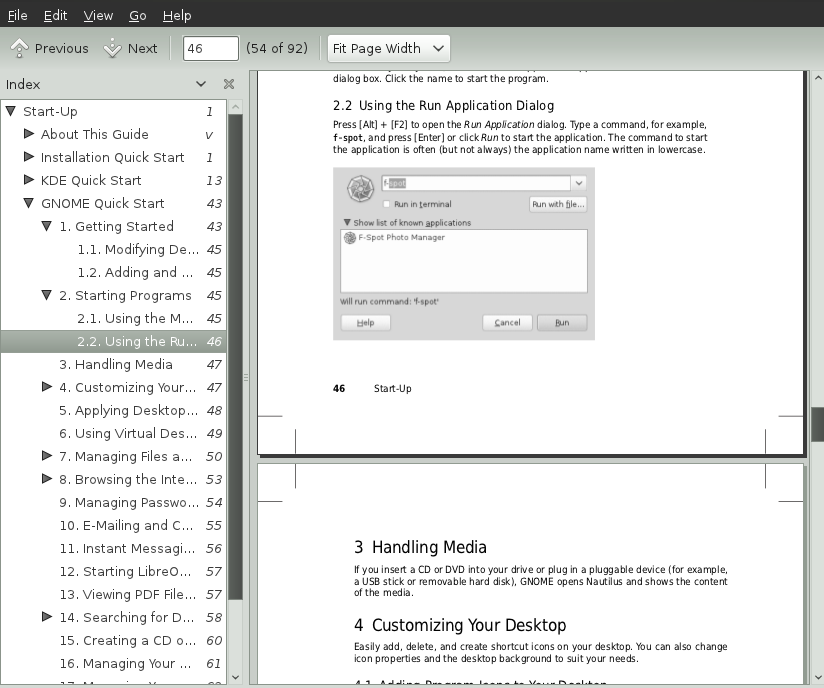
3.13. Viewing PDF Files and Other Documents
Documents that need to be shared or printed across platforms are often distributed as PDF (Portable Document Format) files. PDF files can be created using the LibreOffice suite or other applications. The GNOME PDF viewer is called Evince. It can be used to view PDFs and many other document formats, like PostScript, DjVu, DVI, and multi-page TIFFs.
To start Evince, press Alt+F2 and enter evince .
3.14. Searching for Data
GNOME provides more than one application for finding data on your computer or in the file system.
3.14.1. Using Desktop Search
To locate files or programs on your computer, click . Enter a search term in the field and press Enter. The results are displayed in the .
You can also start the Needle application by clicking +++.
3.14.2. Using GNOME Do
GNOME Do describes itself as an «intelligent launcher that makes performing common tasks on your computer simple and efficient.» It is extensible with plug-ins.
Start it by pressing Super+Space. The Super is normally located on the left and right Windows or Penguin key.
GNOME Do allows you to perform specific actions. For example, if you
type b, it displays a starter button for the Banshee,
the music player:
 |
To customize GNOME Do to your needs, select the arrow button on the upper-right corner of the window and select . It gives you a list of plug-ins to search for mails in Evolution, listen to your music, etc.
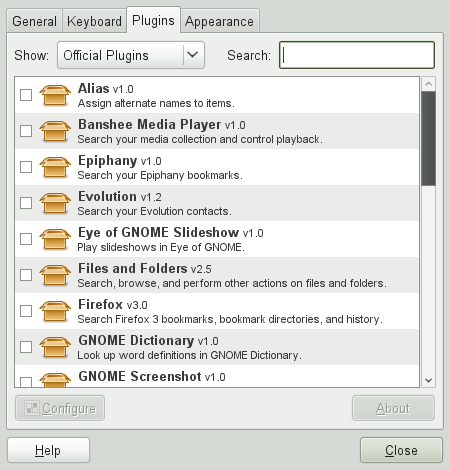 |
3.15. Creating a CD or DVD
If your system has a CD or DVD writer, use the Nautilus file manager to burn CDs and DVDs.
Click +++, or just insert a blank disk.
Copy the files and folders you want to put on the CD or DVD into the Nautilus window.

Click .
Modify the relevant information in the dialog box, or accept the default values, then click . The files are burned to the disk. This could take a few minutes, depending on the amount of data being burned and the speed of your burner.
You can also use the more advanced burning tool Brasero, or Banshee to burn data and audio CDs.
3.16. Managing Your Digital Image Collection
F-Spot is a management tool for your collection of digital images, tailored for the GNOME desktop. It allows you to assign different tags to your images in order to categorize them, and offers various image editing options. For example, you can remove red-eye, crop, and adjust brightness and colors. F-Spot supports all important image formats, including JPEG, PNG, TIFF, and several vendor specific RAW formats.
You can import photos from your hard drive, your digital camera, or your iPod. You can also use F-Spot to create photo CDs, generate a Website gallery, or export your photos to your Flickr, 23, Picasa Web, or SmugMug account.
To access F-Spot, click + or press Alt+F2 and enter f-spot. The first time you run F-Spot, you must define the location from where you want to import images into your collection. If you already have a collection of images stored on your hard drive, enter the path to the directory and (optionally) include subfolders. F-Spot imports these images into its database.
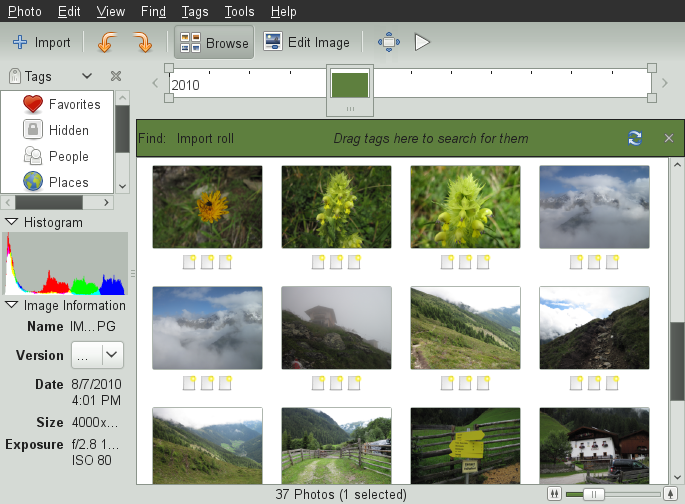 |
Thumbnails of your images are displayed in the right part of the window, and detailed information for a selected image is displayed in a sidebar to the left. By default, your photos are displayed in reverse-chronological order, so your newest photos are always at the top. You can sort your photos in chronological order or reverse-alphabetical order by clicking +.
A menu bar at the top of the window allows you to access the main menus. A toolbar below offers several different functions depicted by a matching icon.
3.17. Managing Your Music and Videos
Use Banshee to import CDs, sync your media collection to a digital media player, play music directly from a digital media player, create playlists with songs or videos from your library, create audio and data CDs from subsets of your library, and subscribe to, download, and listen to your favorite podcasts. Banshee also has an Internet Radio plug-in that allows you to listen to audio streams.
To open Banshee, click + or press Alt+F2 and enter banshee-1.
When you start Banshee for the first time, you need to import your media to make them available in the library. To do so, select + from the menu. Choose an import source and click . After successfully importing your media, you can access them from your library.
 |
To play a song or a movie, simply select it in the library and click the play button. You can also use the buttons in the upper left corner to pause a song or play the next or previous song. Use the loudspeaker button on the right to adjust the volume.
Banshee also has an integrated CD player. When you insert a music CD, your CD title appears in the left panel. Select the title and click the button to play your full CD.
To create audio and MP3 CDs, select the songs you want, then click the + from the menu.
3.18. Logging Out
When you are finished using the computer, you can log out and leave the system running, or restart or shut down the computer.
3.18.1. Logging Out or Switching Users
Click +, then select one of the following options:
Log out. Logs you out of the current session and returns you to the login screen.
Switch User. Suspends your session, allowing another user to log in and use the computer.
3.18.2. Restarting or Shutting Down the Computer
Click +, then select one of the following options:
Shutdown. Logs you out of the current session, then turns off the computer.
Restart. Logs you out of the current session, then restarts the computer.
Suspend. Puts your computer in a temporary state that conserves power. The state of your session is preserved, however, including all applications you have running and all documents you have open.
Hibernate. Suspends your session, using no power until the computer is restarted. The state of your session is preserved, however, including all applications you have running and all documents you have open.
3.19. For More Information
To learn more about GNOME and GNOME applications, refer to http://www.gnome.org/.